Create an on-call pay report
Last updated: June 6, 2025
Our pay calculator provides a quick and easy way to pull compensation for your on-call responders without having to manage internal tooling and scripts to do the same.
This help article will walk through two different approaches in how you can calculate pay using:
Single pay configuration
Multiple pay configurations
To get started, you'll need to head over to the 'Pay calculator' tab within the On-call section of https://app.incident.io. Friendly reminder that only On-call customers will be able to use the calculator to generate reports!
Single pay configuration
For most organizations, leveraging a single pay configuration will suffice as it supports those that pay all of their on-call responders the same rate.
To generate a report, you will need to first create a pay configuration via the 'Configure' button on the top right.
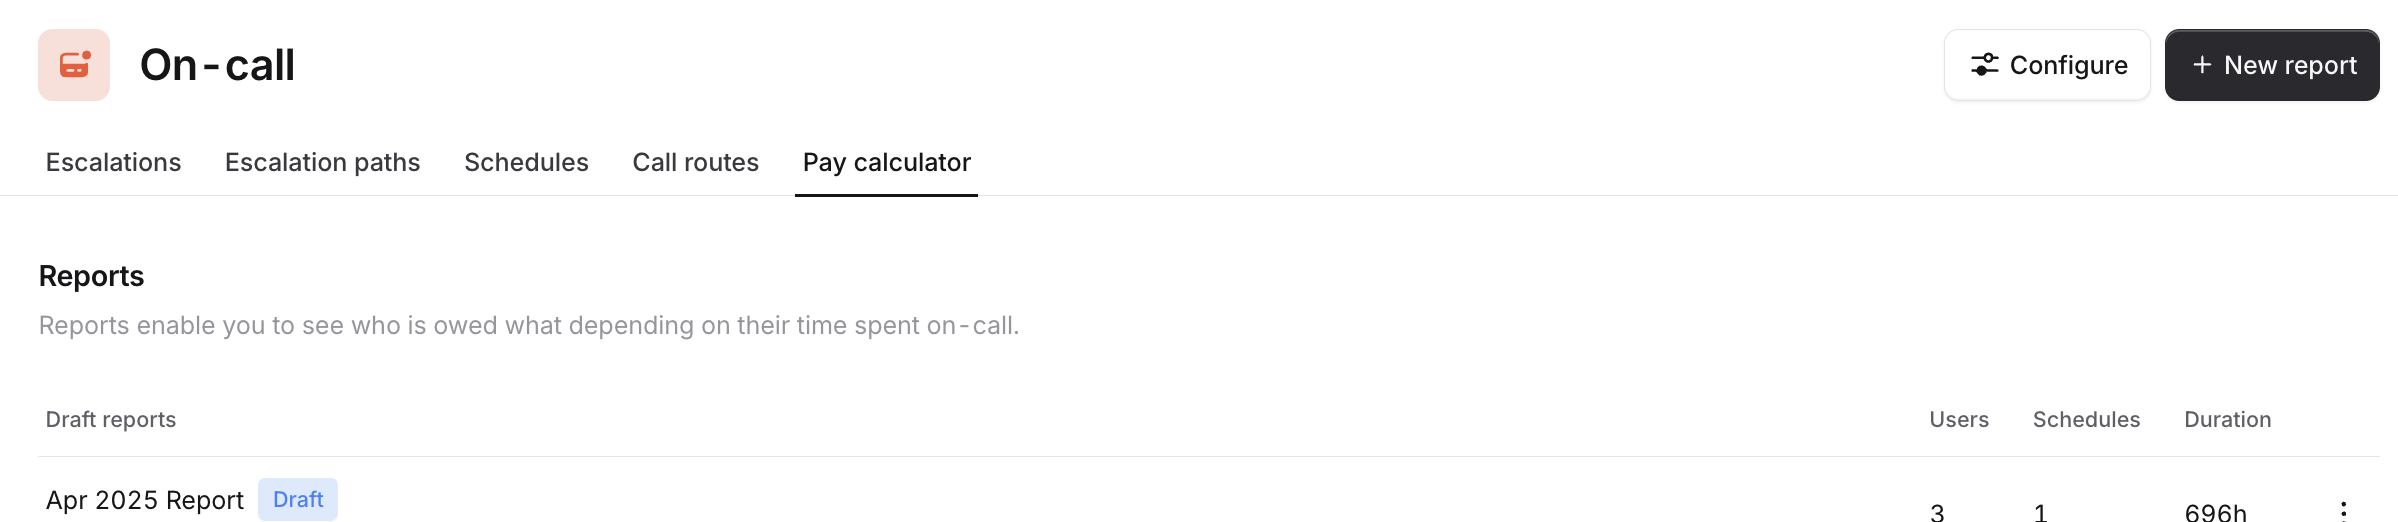
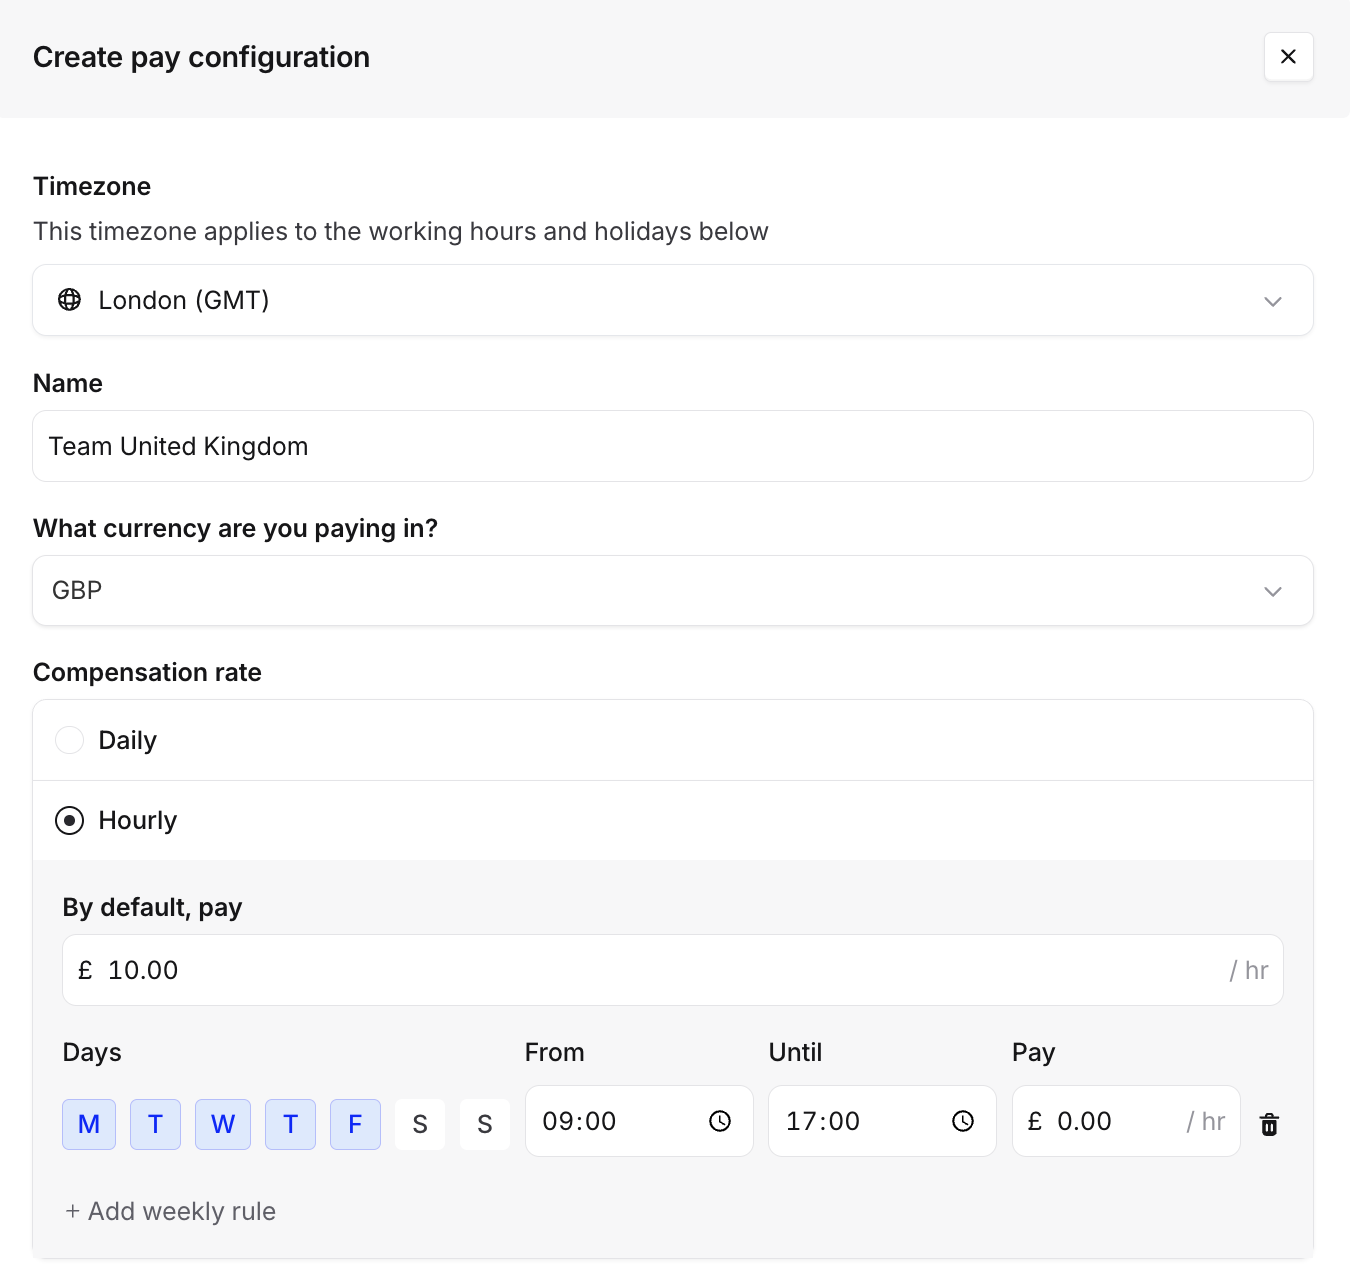
From here you can set your pay configuration to include all the rules for paying your on-call responders, including:
Currency to be paid in
Holidays
Daily or hourly pay rates
For example, if you pay £10 / hr every day, except Monday - Friday 9am - 5pm during working hours, this would look like:
Once you have set your pay configuration rules, you can create a new report. Steps to generate a report include:
Settings
Please create a name and specify the time range for your pay report (ie. the past month)
Schedules
Here you can select any schedules that should receive compensation for being on call.
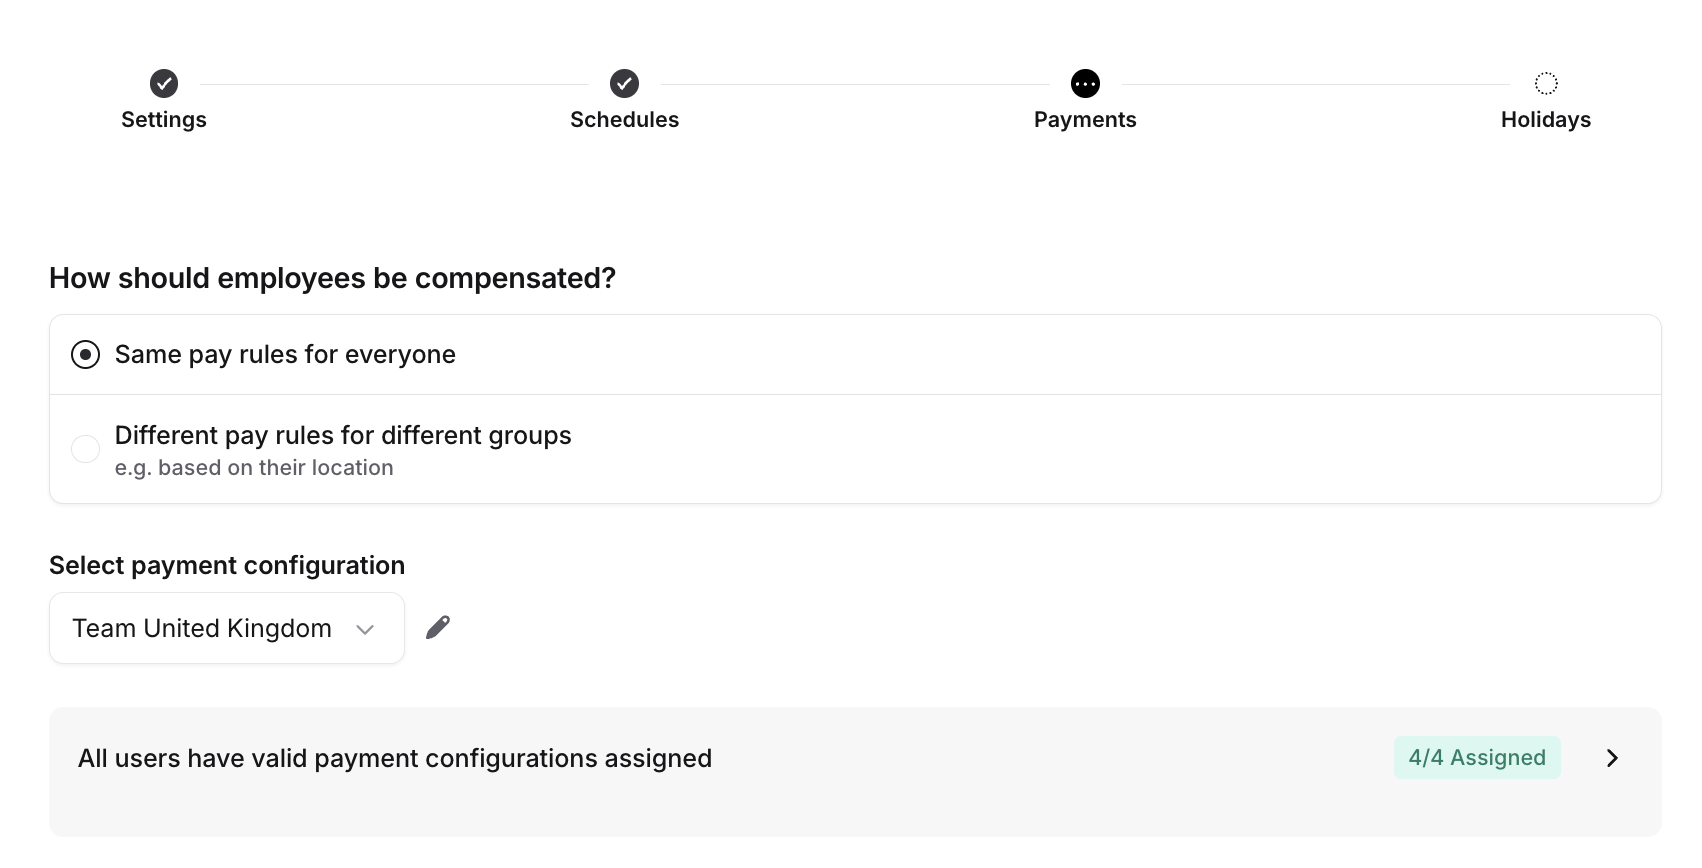
Payments
Within Payments, you should select 'Same pay rules for everyone' and then select the payment configuration you set to apply to the report.
Holidays
Please check that you have accounted for any holidays that require additional or different payment. You can either import public holidays from our tool or you can manually add (useful if you have separate company holidays!).
Generate
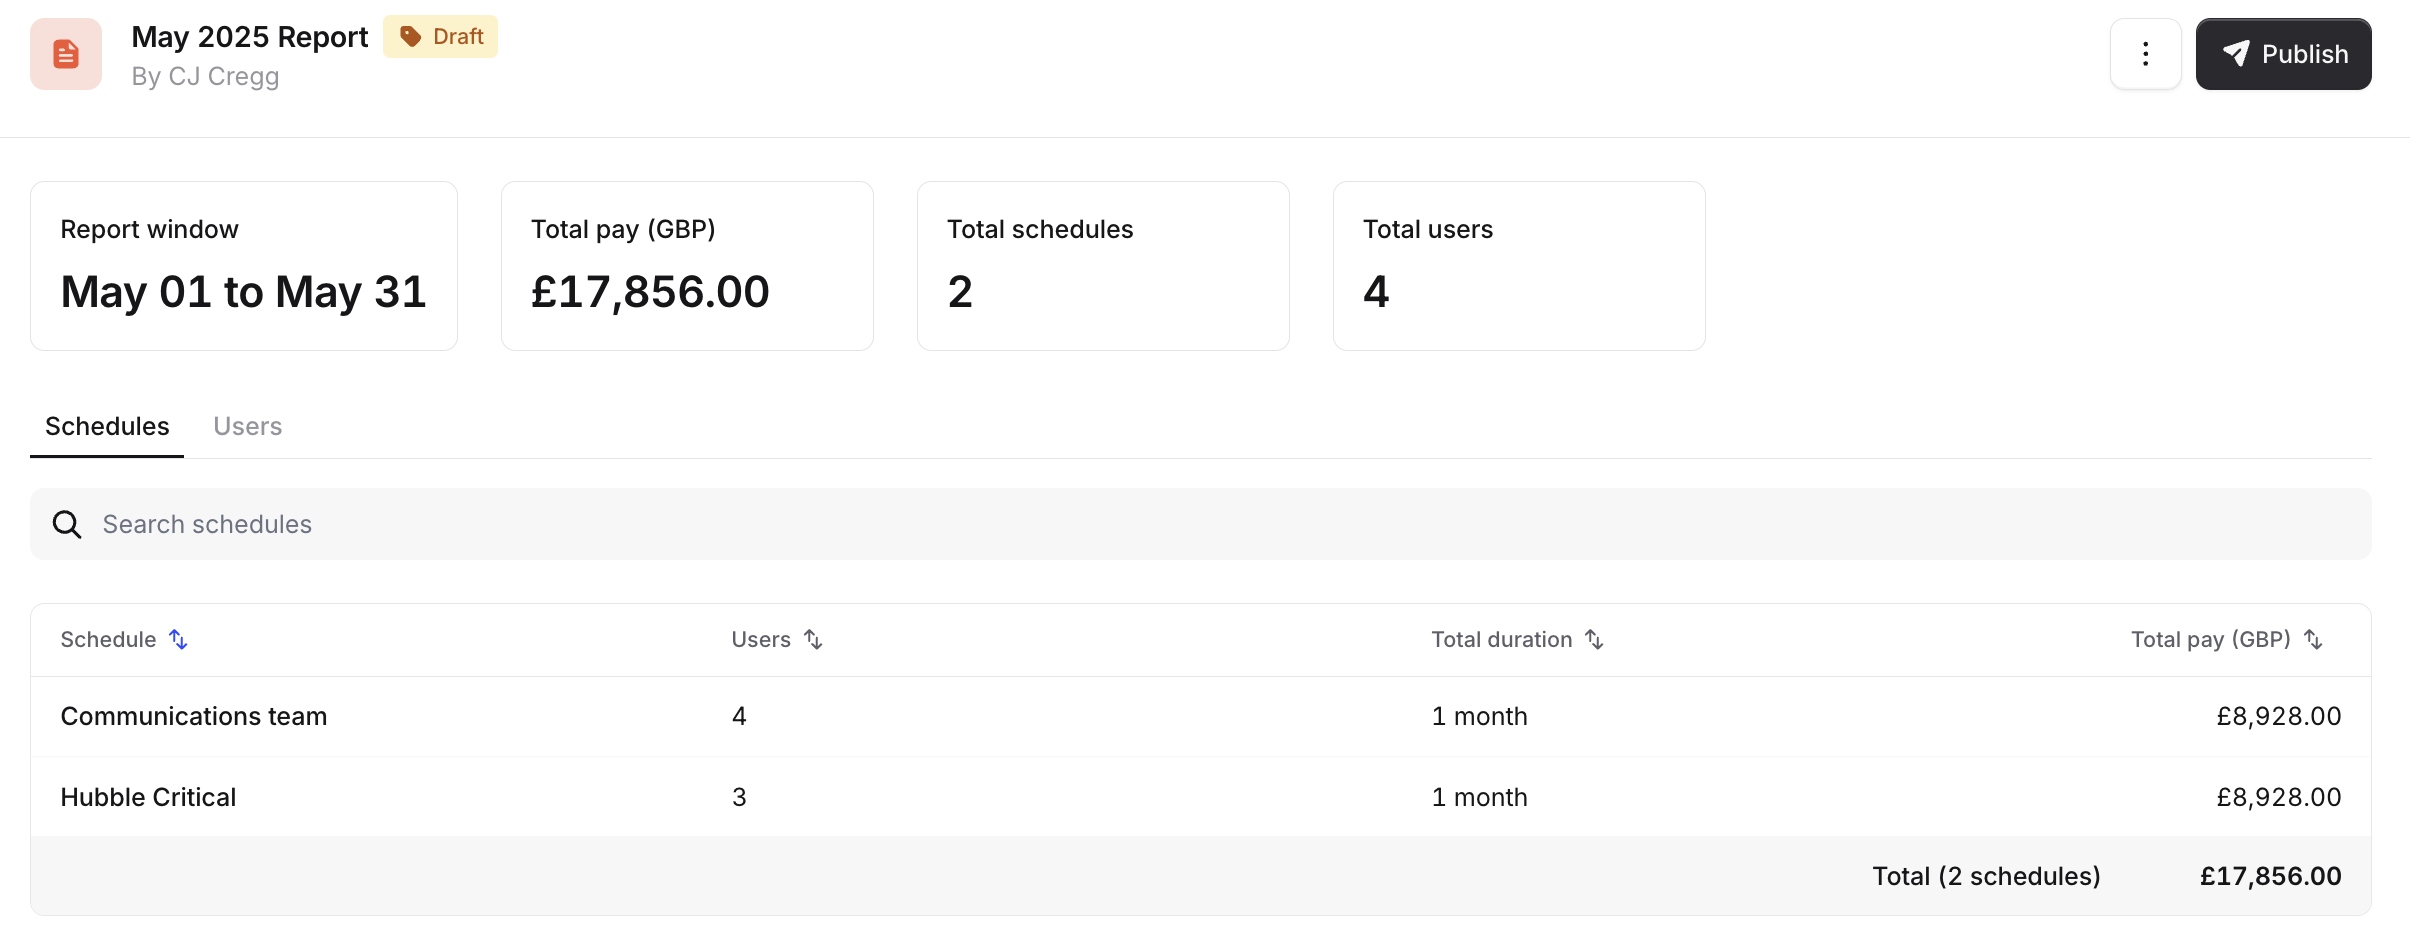
Once you've completed all the above steps you can generate your report in a draft state so you can review before finally publishing!
Multiple pay configurations
Now, if your organization pays on-call responders different rates depending on different factors, you will want to generate a report using multiple pay configurations. Examples of this include:
Location-based compensation
Role-based compensation
Tier 1 vs Tier 2 engineer compensation
We will walk through a location-based model below, but the approach will apply to any of these types of scenarios.
To start, you will need to set up all your different pay configurations via the 'Configure' button on the top right.
So, for a location-based model, you may want to set up configurations as such:
Team United Kingdom
Currency: £
Timezone: London (GMT)
Hourly pay rates: £10 / hr every day, except Monday - Friday 9am - 5pm during working hours
Holidays: United Kingdom
Team USA
Currency: $
Timezone: New York (EST)
Hourly pay rates: $15 / hr every day, except Monday - Friday 8am - 6pm during working hours
Holidays: United States
Team Australia
Currency: AUD
Timezone: Melbourne (GMT+10)
Hourly pay rates: $10 / hr every day, except Monday - Friday 9:30am - 5:30pm
Holidays: Australia
Next, you will want to go to the Catalog and connect Users to an Office. This is how you will be able to connect the pay configurations to the appropriate on-call users during report generation. So, for example, I can make connections that look like so:
Anna is in the Melbourne Office
Sarah is in the NY office
Ben is in the London office
To do this, you will need to create a Catalog type, such as Office, with different name values and associate the Users with those locations. Then in the User catalog type, create a derived attribute called Office that has the path Office > Users.
Note: If you need additional help working with the Catalog, please refer to help content here.
Once you have set your pay configuration rules and have connected locations to users in the Catalog, you can create a new report. Steps to generate a report include:
Settings
Please create a name and specify the time range for your pay report
Schedules
Here you can select any schedules that should receive compensation for being on call.
Payments
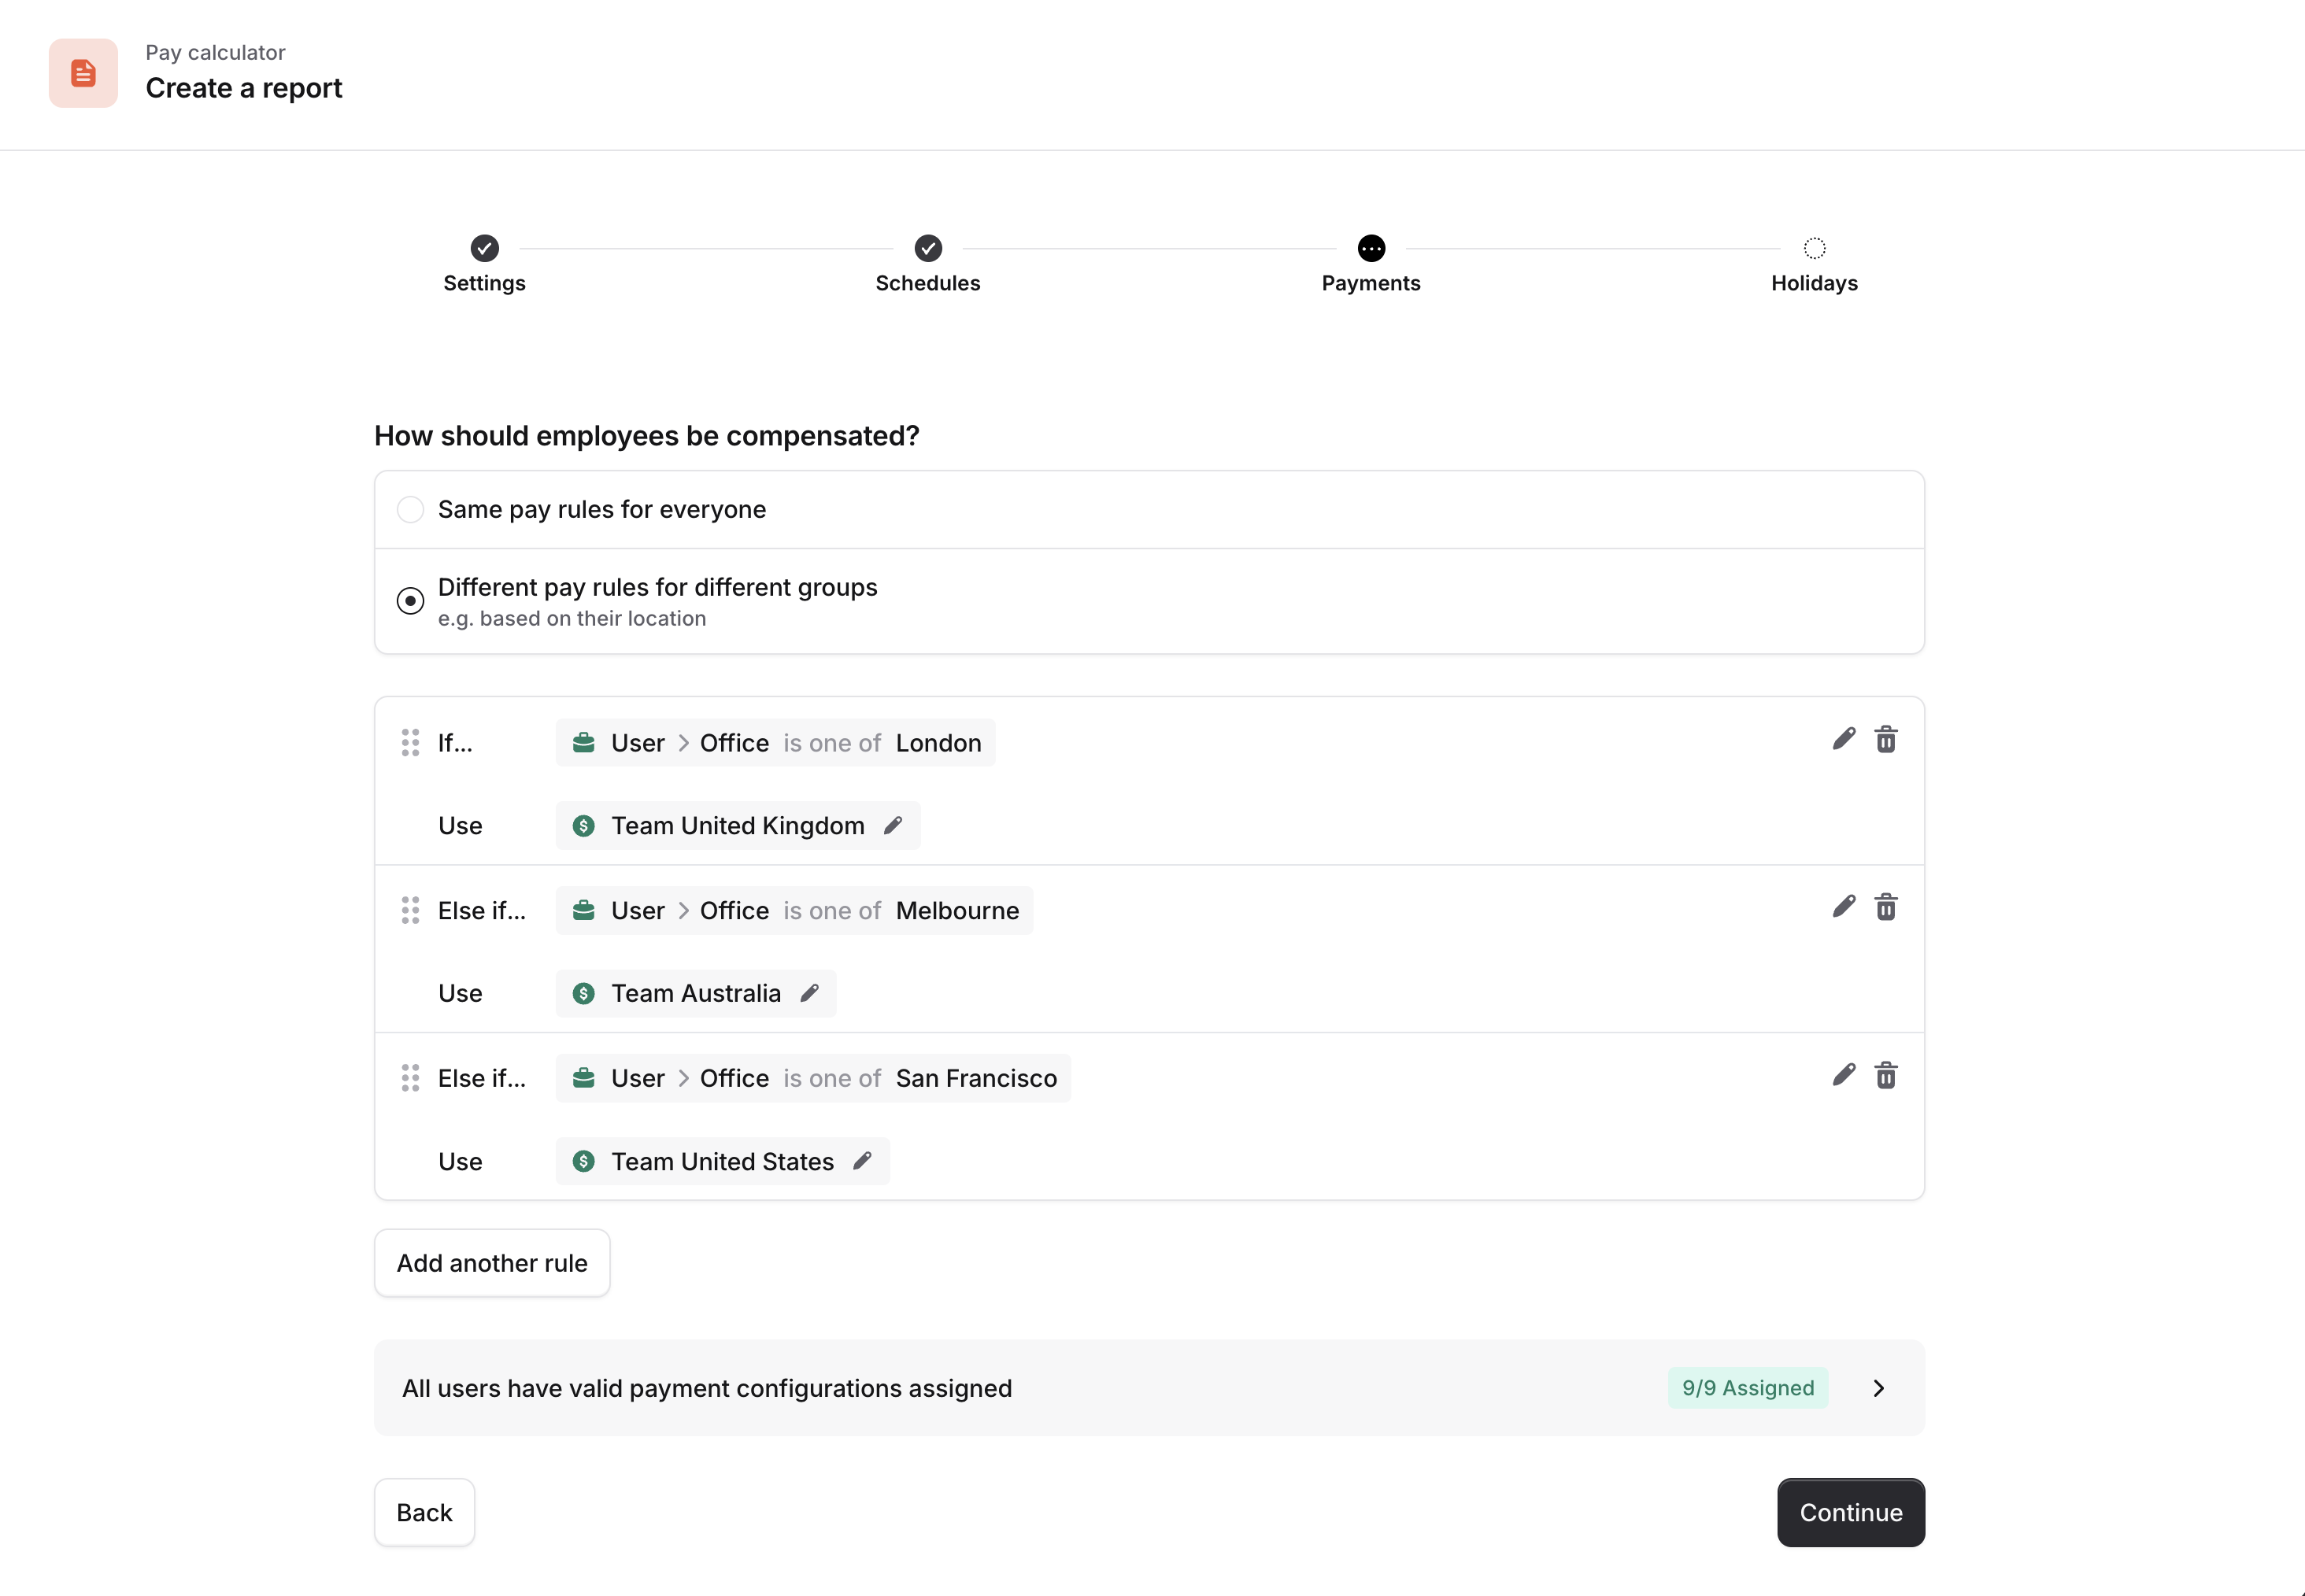
Here you should select 'Different pay rules for different groups.' From here you will want to use If expressions to connect Users -> Office -> Pay configurations. See screenshot for an example of how this can be set up:
Holidays
Please check that you have accounted for any holidays that require additional or different payment. You can either import public holidays from our tool or you can manually add (useful if you have separate company holidays!).
Generate
Then you can generate your report in a draft state so you can review before publishing!
We also have a helpful Loom to walk you through this type of report generation, which you can find here.
Additional tips for generating reports
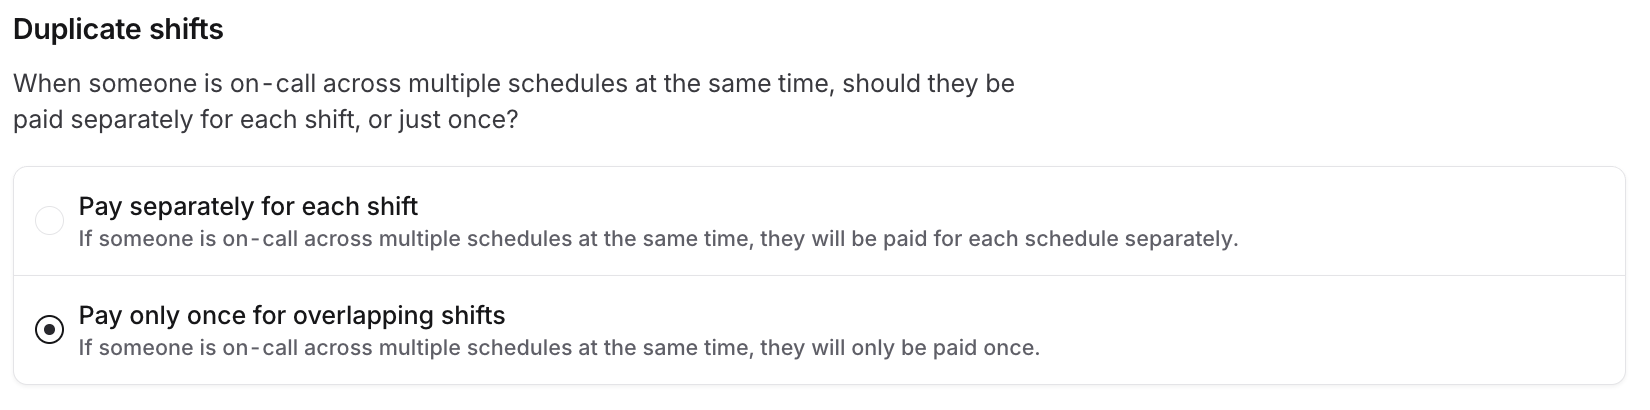
Deduplication: If you have users that are on-call for multiple schedules at once, and want to deduplicate payments, please select 'Pay only once for overlapping shifts' while generating a report.
Create using old report: You can create a new report based on a previous one (which will reuse the same schedules and pay configurations so you don't have to reselect everything each month!).